Skip to content

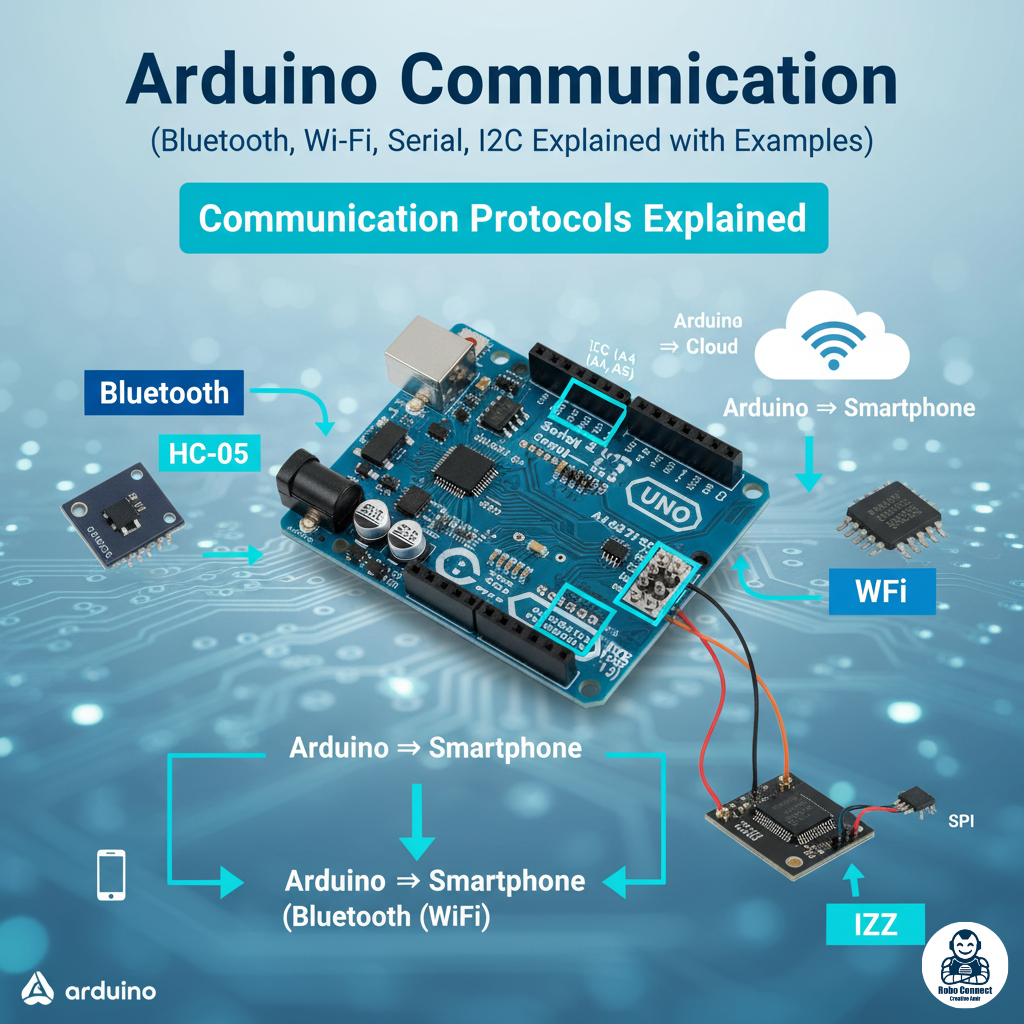
Arduino Communication (Bluetooth, Wi‑Fi, Serial, I2C, SPI Explained with Examples)

Introduction

Arduino gets super powerful once it can communicate with other devices: your laptop, smartphone, sensors, or even the internet. This is how projects move from simple circuits into real-world smart systems.

In this guide, we’ll explain the five most common communication methods:

  • Serial (USB/Serial Monitor)
  • Bluetooth (HC‑05 modules)
  • Wi‑Fi (ESP8266/ESP32)
  • I2C (sensors, LCDs, multiple modules on same 2 wires)
  • SPI (fast data transfer with SD cards, displays, etc.)

Each includes a wiring note + copy‑paste Arduino example.

  1. Serial Communication (UART)

The simplest! Arduino talks over USB cable with your PC using Serial Monitor.

Code (Echo Example):

C++

void setup() {

Serial.begin(9600);

}


void loop() {

if (Serial.available() > 0) {

char data = Serial.read();

Serial.print(“You typed: “);

Serial.println(data);

}

}

Open Tools → Serial Monitor → Type something → Arduino echoes it back.

  1. Arduino + Bluetooth (HC‑05/HC‑06 Module)

Used to send/receive data between Arduino and smartphones or wireless devices.

Wiring (HC‑05):

  • HC‑05 VCC → 5V, GND → GND
  • TX → Arduino RX (pin 0)
  • RX → Arduino TX (pin 1) via voltage divider to avoid 5V on HC‑05 input

Code (Basic Bluetooth Echo):

C++

void setup() {

Serial.begin(9600);  // Default HC-05 speed

}


void loop() {

if (Serial.available()) {

char c = Serial.read();

Serial.print(“Received: “);

Serial.println(c);

}

}

Send data from a Bluetooth terminal app → Arduino prints back.

  1. Arduino + Wi‑Fi (ESP8266/ESP32)

Connects Arduino to the Internet of Things (IoT). Usually handled by ESP8266 or ESP32 board, but Arduino Uno can talk to ESP8266 as a Wi‑Fi module with AT commands.

Example (ESP8266 sending “Hello” to Serial):

C++

#include <ESP8266WiFi.h>


const char* ssid = “YourWiFi”;

const char* password = “YourPassword”;


void setup() {

Serial.begin(115200);

WiFi.begin(ssid, password);

while (WiFi.status() != WL_CONNECTED) {

delay(500);

Serial.print(“.”);

}

Serial.println(“Connected to WiFi!”);

}


void loop() {

// Could send sensor data to a cloud server here

}

Arduino can now send sensor data online—for example, log temperatures to a cloud dashboard.

  1. SPI Communication

SPI = Serial Peripheral Interface. Faster than I2C, uses 4+ wires: MOSI, MISO, SCK, CS.

Uses: MicroSD cards, high‑speed displays, certain sensors.
Wiring (e.g., Arduino Uno):

  • MOSI → pin 11
  • MISO → pin 12
  • SCK → pin 13
  • CS (Chip Select) → custom (e.g., pin 10)

Code (SPI Write/Read Example):

C++

#include <SPI.h>


void setup() {

Serial.begin(9600);

SPI.begin();

digitalWrite(10, HIGH); // CS pin idle HIGH

}


void loop() {

digitalWrite(10, LOW); // Select device

byte response = SPI.transfer(0x42); // Send 0x42

digitalWrite(10, HIGH); // Deselect device


Serial.print(“Response: “);

Serial.println(response);

delay(1000);

}

Used when you need speed + large data transfer (e.g., images to LCD displays).

FAQs

Q: Which communication method should I use for beginners?
A: Start with Serial (USB + Serial Monitor) for testing → then move to Bluetooth or I2C.

Q: Can I use multiple protocols at once?
A: Yes! Many projects use Serial + I2C + SPI together.

Q: Is Bluetooth or Wi‑Fi better?

  • Bluetooth = short range, simple.
  • Wi‑Fi = internet IoT, longer range. Depends on your project.

Quick Comparison Table

Method Wires Needed Speed Typical Uses
Serial 1 TX, 1 RX ~1 Mbps Debugging, Bluetooth modules
Bluetooth TX/RX wireless ~1 Mbps Phone ↔ Arduino control
Wi‑Fi TX/RX wireless High IoT, online dashboards
I2C SDA + SCL (2 wires) Medium Sensors, LCDs, multiple devices
SPI MISO, MOSI, SCK, CS High SD cards, high‑speed displays

FAQs

Q: Which communication method should I use for beginners?
A: Start with Serial (USB + Serial Monitor) for testing → then move to Bluetooth or I2C.

Q: Can I use multiple protocols at once?
A: Yes! Many projects use Serial + I2C + SPI together.

Q: Is Bluetooth or Wi‑Fi better?

  • Bluetooth = short range, simple.
  • Wi‑Fi = internet IoT, longer range. Depends on your project.

Conclusion

Communication expands Arduino’s capabilities far beyond blinking LEDs:

  • Serial helps debug.
  • Bluetooth links to your phone.
  • Wi‑Fi connects to the cloud.
  • I2C chains multiple sensors.
  • SPI powers fast storage and displays.

Once you unlock these, your Arduino stops being a standalone toy and becomes a connected smart system.