Introduction
The ESP32 is not just another microcontroller. It’s a powerhouse board that combines a dual‑core processor, built‑in Wi‑Fi, Bluetooth (Classic + BLE), and tons of GPIO pins — all packed into a tiny and affordable development board.
What makes the ESP32 so popular is how easily it can connect electronics projects to the internet, smartphones, and cloud services. That’s why beginners love it for Internet of Things (IoT) projects.
In this guide, we’ll explore 3 hands‑on projects you can build with ESP32:
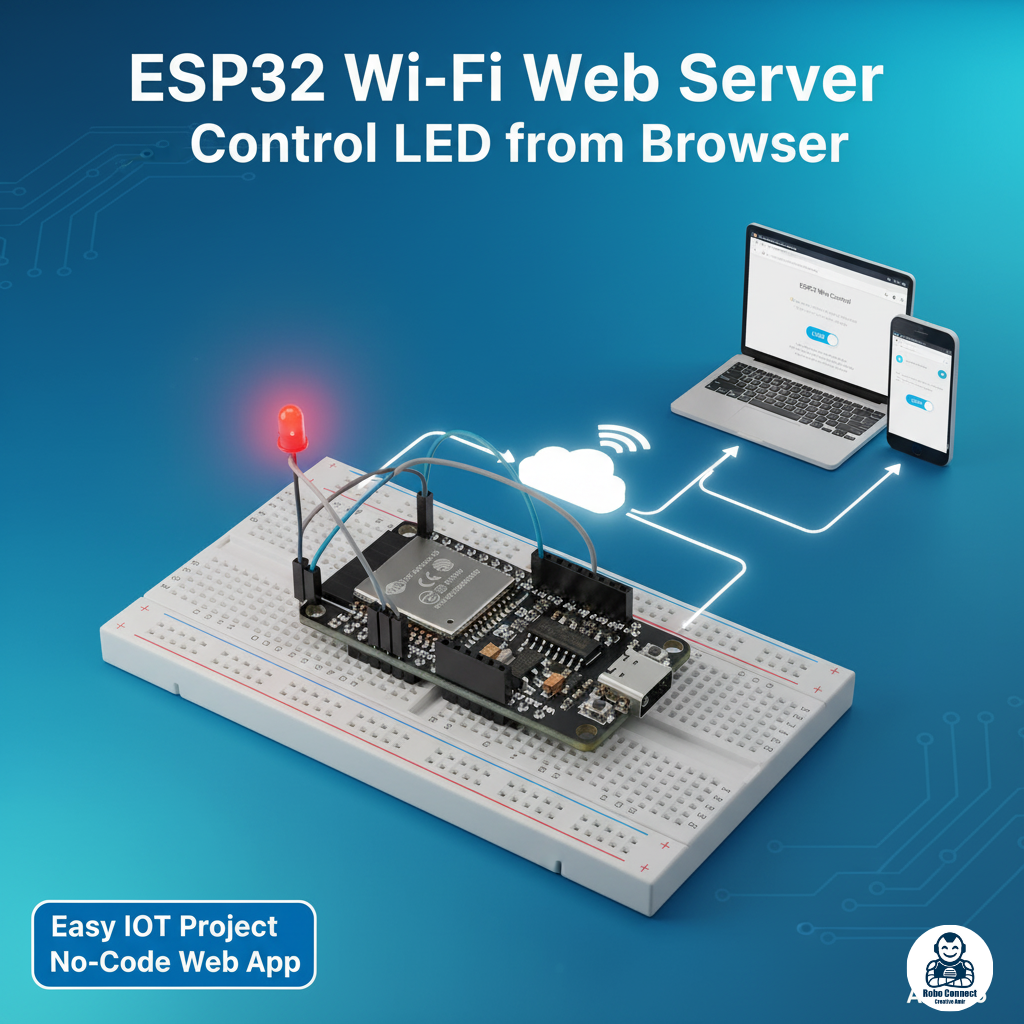
- 🌐 A Wi‑Fi Web Server to control devices from your browser.
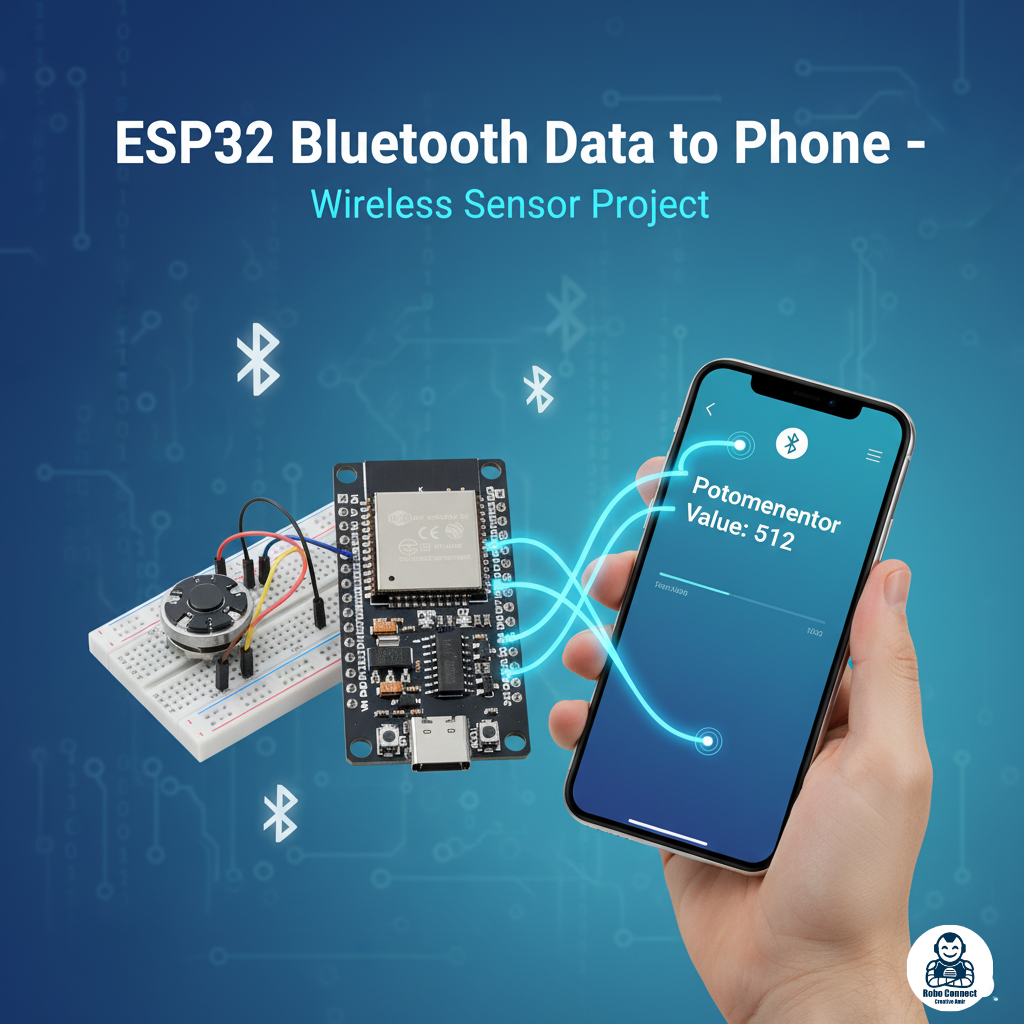
- 📱 A Bluetooth project to exchange data with your phone.
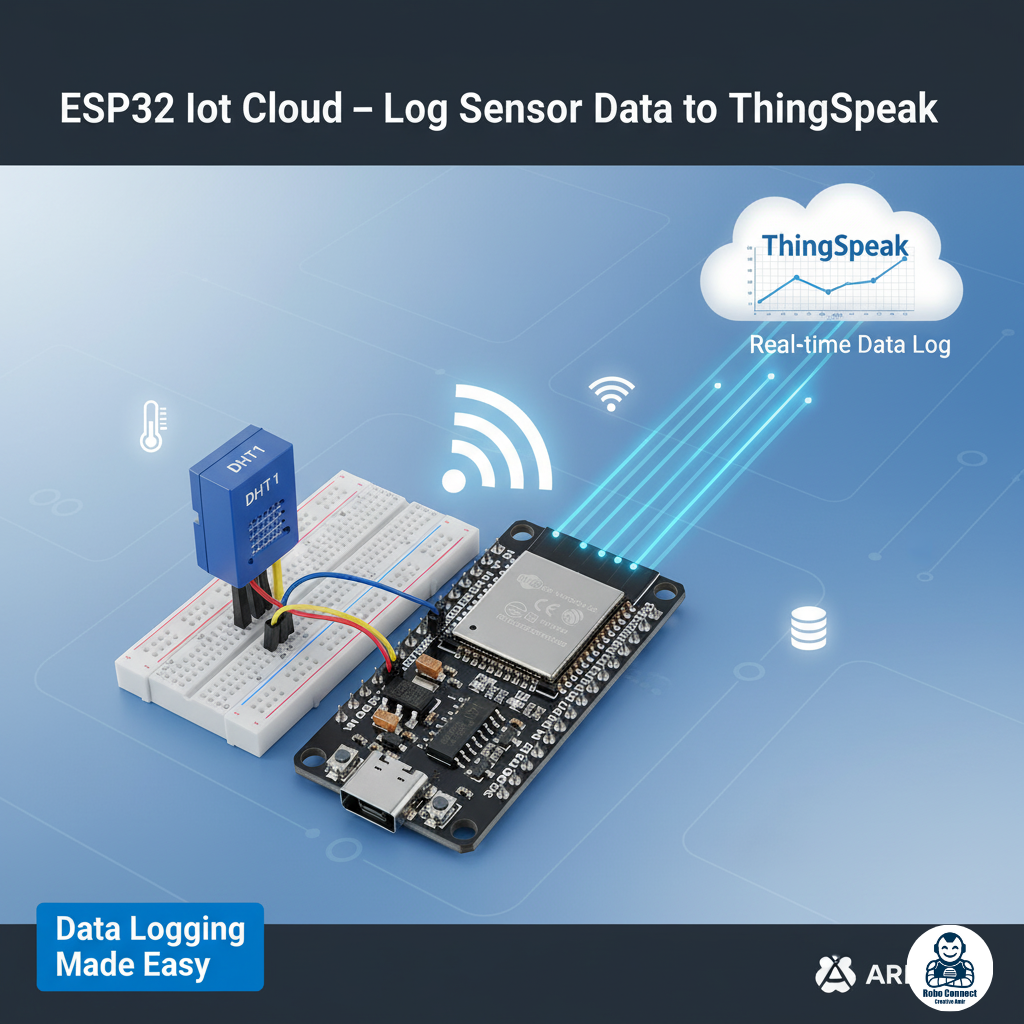
- ☁️ An IoT Cloud example where your ESP32 logs sensor data online.
Don’t worry if you’re new — we’ll go step by step with explanations, wiring notes, and ready‑to‑copy Arduino IDE code.
What You’ll Need
- ESP32 DevKit V1 board (or compatible)
- Arduino IDE (with ESP32 board support installed)
- USB cable to connect ESP32 to your computer
- A home Wi‑Fi network (router with SSID + password)
- (Optional for Project 1) An LED + 220Ω resistor
- (Optional for Project 3) A simple sensor like a potentiometer or LM35 temperature
Project 1: ESP32 Wi‑Fi Web Server (Control LED from Browser)
Concept
The ESP32 can host its own mini‑web server. When you type the board’s IP address in your browser, you’ll see a page with ON/OFF options to control an LED.
This is the simplest demonstration of how ESP32 brings an ordinary circuit onto the web.
Wiring
- Use onboard LED at GPIO2 (or external LED connected to pin 2 via resistor to GND).
Code
C++
#include <WiFi.h>
#include <WebServer.h>
const char* ssid = “YourWiFiName”;
const char* password = “YourWiFiPassword”;
WebServer server(80);
int ledPin = 2; // Onboard LED
void handleRoot() {
String page = “<h1>ESP32 Web Server</h1>”;
page += “<p><a href=\”/on\”>Turn ON LED</a></p>”;
page += “<p><a href=\”/off\”>Turn OFF LED</a></p>”;
server.send(200, “text/html”, page);
}
void handleOn() {
digitalWrite(ledPin, HIGH);
server.send(200, “text/html”, “LED is ON<br><a href=\”/\”>Back</a>”);
}
void handleOff() {
digitalWrite(ledPin, LOW);
server.send(200, “text/html”, “LED is OFF<br><a href=\”/\”>Back</a>”);
}
void setup() {
pinMode(ledPin, OUTPUT);
Serial.begin(115200);
WiFi.begin(ssid, password);
Serial.print(“Connecting to WiFi”);
while (WiFi.status() != WL_CONNECTED) {
delay(500);
Serial.print(“.”);
}
Serial.println(“\nConnected! IP address: “);
Serial.println(WiFi.localIP());
server.on(“/”, handleRoot);
server.on(“/on”, handleOn);
server.on(“/off”, handleOff);
server.begin();
}
void loop() {
server.handleClient();
}
How It Works
- ESP32 connects to your Wi‑Fi.
- It starts a server on port 80 (like a website server).
- When a browser requests /on or /off, it changes LED state.
🌐 Result: Your ESP32 is now acting as a web‑controlled IoT switch.
Project 2: ESP32 Bluetooth (Send Data to Phone)
Concept
The ESP32 supports Bluetooth Classic + BLE (Bluetooth Low Energy). This lets you pair your phone and exchange data wirelessly — without needing Wi‑Fi.
Perfect for short‑range projects like remote sensing, fitness trackers, or robot control.
Code
C++
#include “BluetoothSerial.h”
BluetoothSerial SerialBT;
int potPin = 34;
void setup() {
Serial.begin(115200);
SerialBT.begin(“ESP32_BT”); // Bluetooth device name
Serial.println(“Bluetooth started. Pair phone now!”);
}
void loop() {
int potValue = analogRead(potPin);
SerialBT.print(“Potentiometer Value: “);
SerialBT.println(potValue);
delay(1000);
}
How It Works
- ESP32 starts as a Bluetooth device named “ESP32_BT”.
- Pair with your phone (use an app like Serial Bluetooth Terminal).
- Every second, ESP32 reads voltage on pin 34 (potentiometer) and sends it to phone.
📱 Result: You can view live sensor data on your smartphone.
Project 3: ESP32 IoT Cloud – Log Data to Thingspeak
Concept
IoT = devices connected to the Internet + Cloud. ESP32 can read a sensor and push values to online platforms like Thingspeak or Arduino IoT Cloud.
This project shows how to stream live sensor data online.
Steps
- Create a free account at Thingspeak.
- Make a new Channel → copy its Channel ID + Write API Key.
Code
C++
#include <WiFi.h>
#include “ThingSpeak.h”
const char* ssid = “YourWiFiName”;
const char* password = “YourWiFiPassword”;
WiFiClient client;
unsigned long channelID = YOUR_CHANNEL_ID;
const char* writeAPIKey = “YOUR_WRITE_API_KEY”;
int sensorPin = 34;
void setup() {
Serial.begin(115200);
WiFi.begin(ssid, password);
while (WiFi.status() != WL_CONNECTED) {
delay(500);
Serial.print(“.”);
}
Serial.println(“Connected to WiFi.”);
ThingSpeak.begin(client);
}
void loop() {
int sensorValue = analogRead(sensorPin);
Serial.println(sensorValue);
int status = ThingSpeak.writeField(channelID, 1, sensorValue, writeAPIKey);
if (status == 200) {
Serial.println(“Data sent successfully”);
} else {
Serial.println(“Error sending data”);
}
delay(20000); // Send updates every 20 seconds
}
How It Works
- ESP32 connects to Wi‑Fi.
- Reads an analog sensor (potentiometer/temperature).
- Uploads values every 20 seconds to Thingspeak.
- You see a live graph of sensor data in your Thingspeak channel.
☁️ Result: You’ve built your first internet‑connected data logger.
Why These 3 Projects Matter
- Project 1 (Wi‑Fi Server) → Basic home automation.
- Project 2 (Bluetooth) → Local wireless projects (no router needed).
- Project 3 (IoT Cloud) → Global connectivity + data logging.
Together, they show the breadth of ESP32’s capability.
Why These 3 Projects Matter
- Project 1 (Wi‑Fi Server) → Basic home automation.
- Project 2 (Bluetooth) → Local wireless projects (no router needed).
- Project 3 (IoT Cloud) → Global connectivity + data logging.
Together, they show the breadth of ESP32’s capability.
Conclusion
The ESP32 isn’t just an Arduino replacement — it’s a full IoT powerhouse. With a single board you can:
- 🌐 Create a web‑controlled device (Wi‑Fi WebServer).
- 📱 Connect to your smartphone with Bluetooth.
- ☁️ Stream live data online (IoT Cloud).
And that’s only scratching the surface. With these first three projects under your belt, you can move on to home automation, robotics, or complete smart systems.