Introduction
One of the most exciting things about Arduino is connecting sensors—tiny devices that let your project sense light, heat, motion, or distance.
In this guide, we’ll cover:
- How to wire common sensors to Arduino.
- How to read sensor values in code.
- Example code you can copy, paste, and run immediately.
By the end, you’ll be ready to build smarter projects that respond to their environment. 🌱⚡
- LDR (Light Dependent Resistor)
Function: Measures brightness. Resistance decreases as light increases.
Pins: VCC → 5V, GND → GND, Signal → A0.
Wiring:
- LDR + resistor as voltage divider → middle pin to A0.
Code:
C++
int ldrPin = A0;
int ldrValue = 0;
void setup() {
Serial.begin(9600);
}
void loop() {
ldrValue = analogRead(ldrPin);
Serial.print(“LDR Value: “);
Serial.println(ldrValue); // 0 (dark) – 1023 (bright)
delay(500);
}
💡 Dark → Low values; Bright → High values.
- LM35 (Temperature Sensor)
Function: Analog sensor, outputs 10mV per °C.
Pins: +Vs → 5V, GND → GND, Vout → A0.
Code:
C++
int tempPin = A0;
float tempC;
void setup() {
Serial.begin(9600);
}
void loop() {
int val = analogRead(tempPin);
tempC = (val / 1023.0) * 5.0 * 100; // Convert to Celsius
Serial.print(“Temperature: “);
Serial.print(tempC);
Serial.println(” °C”);
delay(1000);
}
🌡 Shows real‑time room temperature.
- PIR Motion Sensor (HC‑SR501)
Function: Detects movement (infrared heat from humans/animals).
Pins: VCC → 5V, GND → GND, OUT → pin 2.
Code:
C++
int pirPin = 2;
int pirState = 0;
void setup() {
pinMode(pirPin, INPUT);
Serial.begin(9600);
}
void loop() {
pirState = digitalRead(pirPin);
if (pirState == HIGH) {
Serial.println(“Motion detected!”);
} else {
Serial.println(“No motion.”);
}
delay(500);
}
🕵️ Lights up Serial Monitor when someone walks past.
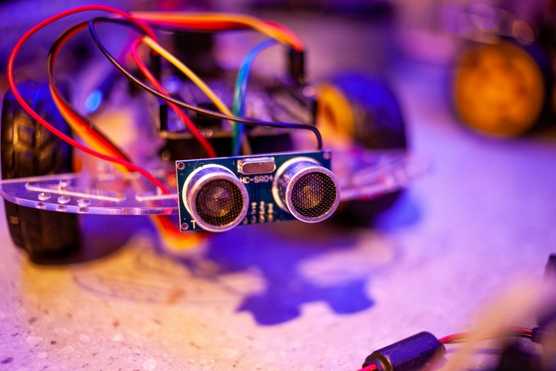
- Ultrasonic Distance Sensor (HC‑SR04)
Function: Measures distance using ultrasonic sound waves.
Pins: VCC → 5V, GND → GND, Trig → pin 9, Echo → pin 10.
Code:
C++
const int trigPin = 9;
const int echoPin = 10;
long duration;
int distance;
void setup() {
pinMode(trigPin, OUTPUT);
pinMode(echoPin, INPUT);
Serial.begin(9600);
}
void loop() {
// Send trigger pulse
digitalWrite(trigPin, LOW);
delayMicroseconds(2);
digitalWrite(trigPin, HIGH);
delayMicroseconds(10);
digitalWrite(trigPin, LOW);
// Read echo response
duration = pulseIn(echoPin, HIGH);
distance = duration * 0.034 / 2; // cm
Serial.print(“Distance: “);
Serial.print(distance);
Serial.println(” cm”);
delay(500);
}
📏 Prints object distance in centimeters.
- DHT11 (Temperature & Humidity Sensor)
Function: Reads both temperature + humidity (digital sensor).
Pins: VCC → 5V, GND → GND, Data → pin 7.
Library Needed: DHT.h (install via Arduino IDE Library Manager).
Code:
C++
#include “DHT.h”
#define DHTPIN 7
#define DHTTYPE DHT11
DHT dht(DHTPIN, DHTTYPE);
void setup() {
Serial.begin(9600);
dht.begin();
}
void loop() {
float h = dht.readHumidity();
float t = dht.readTemperature();
Serial.print(“Humidity: “);
Serial.print(h);
Serial.print(” % | Temp: “);
Serial.print(t);
Serial.println(” °C”);
delay(2000);
}
🌦 Easy way to make a basic weather station.
FAQs
Q: Can I connect multiple sensors at once?
A: Yes—use multiple pins, or use I2C sensors that share wires.
Q: Why is my sensor not giving correct values?
A: Common causes: wiring issues, missing GND, wrong pin, or missing library.
Q: Do I need resistors with sensors?
A: Sometimes (LDR voltage divider). Many modules already have onboard resistors.


