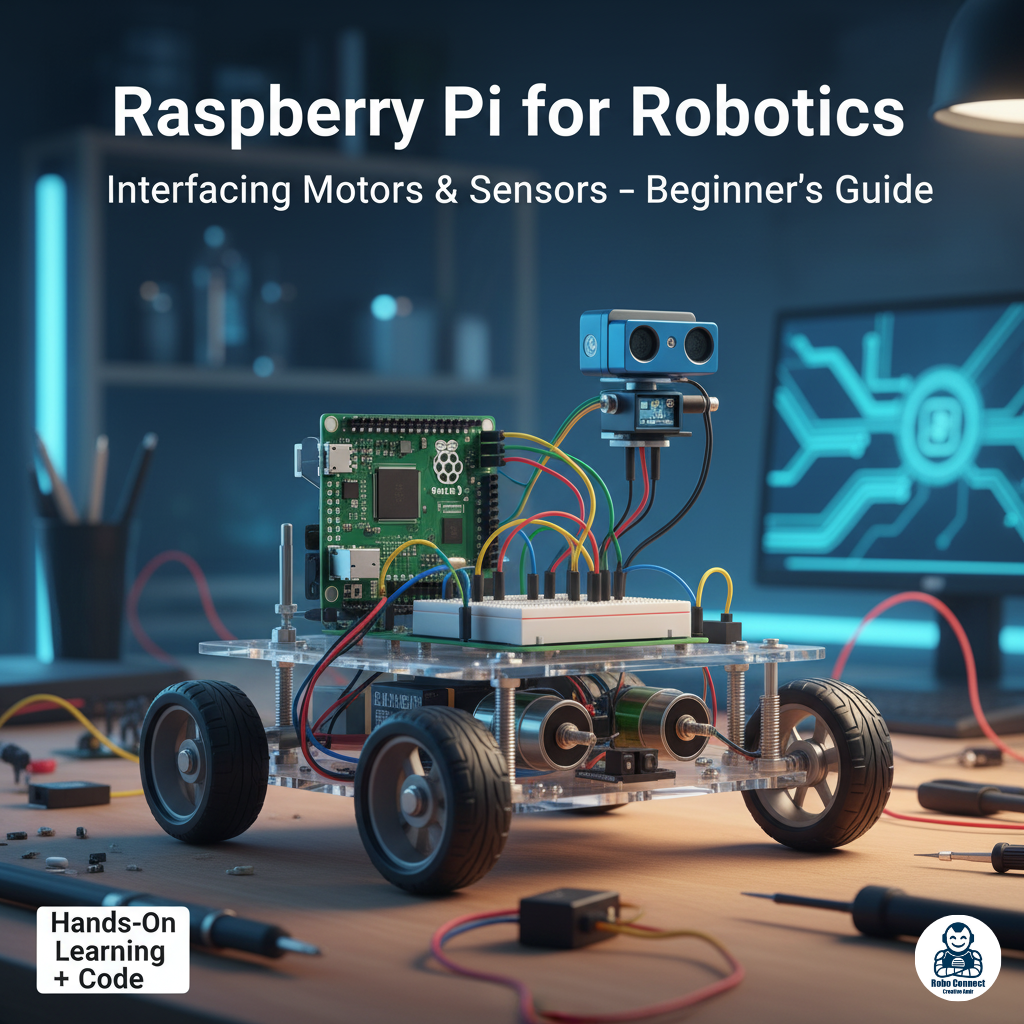
Raspberry Pi for Robotics: Interfacing Motors & Sensors (Beginner’s Guide)
Introduction
The Raspberry Pi is more than a mini computer — it can also become the “brain” of robots. With its GPIO pins (General Purpose Input/Output), the Pi can connect and control motors, read sensors, and make autonomous decisions.
In this guide, you’ll learn:
• How Raspberry Pi is used in robotics.
• Basics of interfacing motors (DC, Servo, Stepper).
• How to connect common sensors (IR, Ultrasonic, Line tracking, etc.).
• Example Python programs to get your robot moving.
By the end, you’ll see how easy it is to turn your Raspberry Pi into the control center of a DIY robot
Why Use Raspberry Pi for Robotics?
• Computing Power: Runs Linux, Python, OpenCV (computer vision), AI libraries.
• Connectivity: Wi Fi + Bluetooth → remote controlled robots.
• Flexibility: Can combine with motor drivers, Arduino boards, and cameras.
• GPIO Pins: 40 pin header → Digital I/O, PWM, I²C, SPI support.
2. Servo Motors
• Rotate to specific angles (0°–180°).
• Great for robotic arms, pan/tilt cameras.
Wiring:
• Servo signal → Pi GPIO (e.g., 17).
• VCC → 5V (use external supply if multiple servos).
• GND → Pi GND.
Python Example (Sweep a Servo):
Python
import RPi.GPIO as GPIO
import time
servo = 17
GPIO.setmode(GPIO.BCM)
GPIO.setup(servo, GPIO.OUT)
pwm = GPIO.PWM(servo, 50) # 50 Hz
pwm.start(0)
for angle in range(0, 181, 30):
duty = 2 + (angle/18)
pwm.ChangeDutyCycle(duty)
time.sleep(0.5)
pwm.stop()
GPIO.cleanup()
Example: Ultrasonic Sensor with Raspberry Pi (HC SR04)
Wiring:
• Trig → GPIO23
• Echo → GPIO24 (use voltage divider for 3.3V safety)
• VCC → 5V, GND → GND
Python Code:
Python
import RPi.GPIO as GPIO
import time
TRIG = 23
ECHO = 24
GPIO.setmode(GPIO.BCM)
GPIO.setup(TRIG, GPIO.OUT)
GPIO.setup(ECHO, GPIO.IN)
def distance():
GPIO.output(TRIG, True)
time.sleep(0.00001)
GPIO.output(TRIG, False)
StartTime = time.time()
StopTime = time.time()
while GPIO.input(ECHO) == 0:
StartTime = time.time()
while GPIO.input(ECHO) == 1:
StopTime = time.time()
TimeElapsed = StopTime – StartTime
dist = (TimeElapsed * 34300) / 2
return dist
try:
while True:
print (“Distance: %.1f cm” % distance())
time.sleep(1)
except KeyboardInterrupt:
GPIO.cleanup()
Output: Robot measures distance in cm.
Perfect for obstacle avoidance robots.
________________________________________
Sensors with Raspberry Pi
Robots need to “sense” the world. The Pi supports analog/digital sensors (using ADC like MCP3008 for analog).
Common Robotics Sensors:
• IR Obstacle Sensor: Detects objects in path → for obstacle avoidance.
• Ultrasonic Sensor (HC SR04): Measures distance via sound waves.
• Line Follower (IR Pair): Detects black/white lines for path following.
• Accelerometer/Gyroscope (MPU6050): For balancing robots.
• Camera Module: For vision/AI robots (OpenCV, TensorFlow).
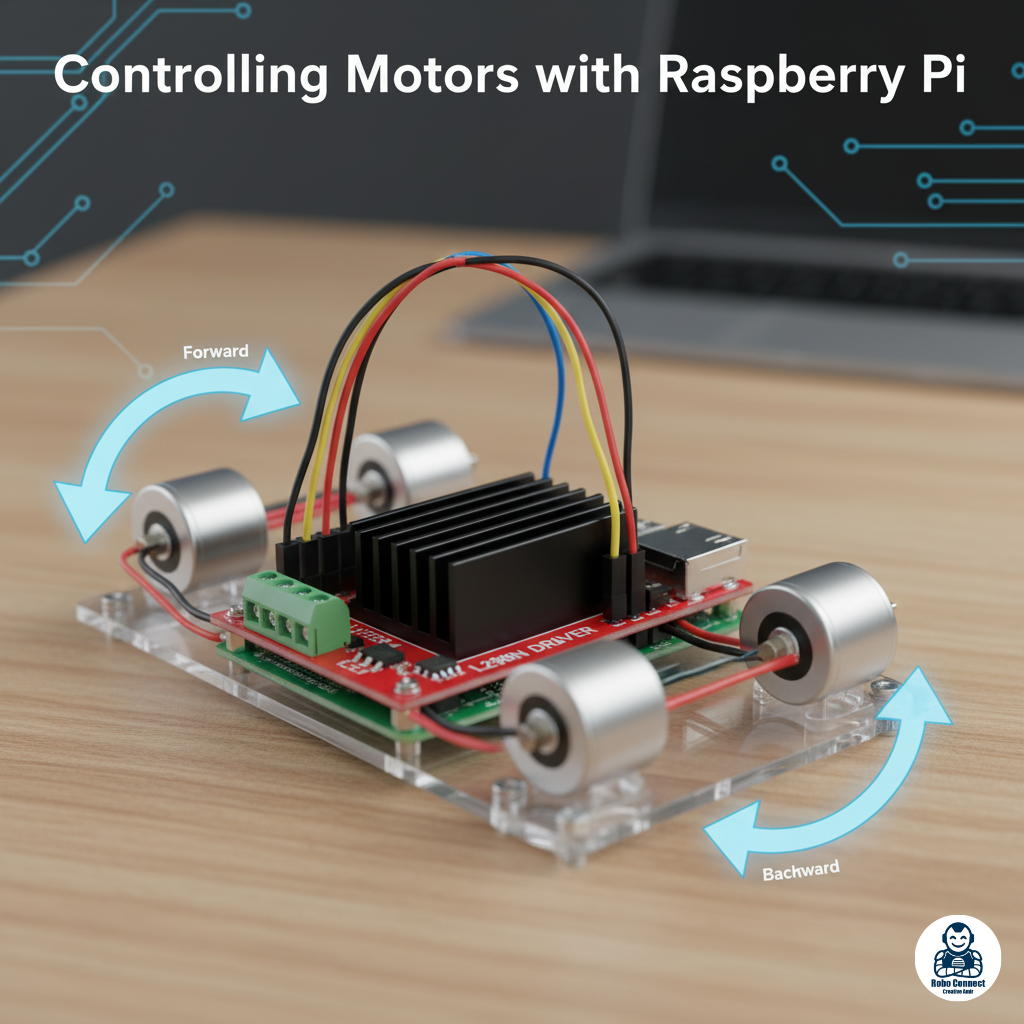
Mini Robot Example: Obstacle Avoidance Car
Combine DC motors (L298N) + Ultrasonic Sensor + ESP/Bluetooth remote → build a smart car that:
• Moves forward until an obstacle is detected.
• Stops/reverses/turns depending on sensor reading.