Skip to content

 Raspberry Pi OS Installation and Setup (Beginner’s Guide)

Introduction

So, you’ve got your new Raspberry Pi — congratulations! 🎉 But before it can do anything cool (like becoming a media center, coding platform, or smart home server), you need to install an operating system (OS).

The official Raspberry Pi OS is the recommended choice for most beginners. It’s based on Debian Linux, lightweight, and comes preloaded with tools like Python, Scratch, LibreOffice, and Chromium browser.

This step‑by‑step guide will show you:

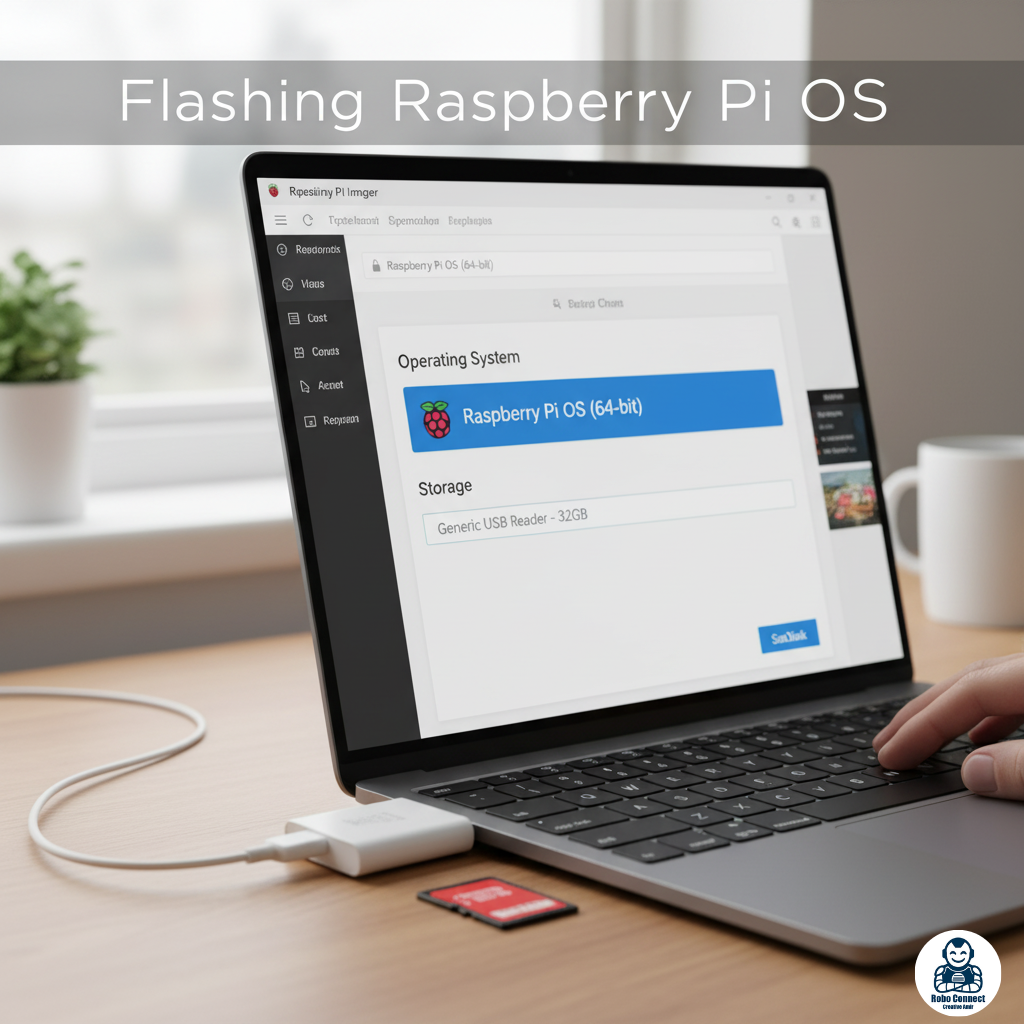
  • How to download Raspberry Pi OS.
  • Different installation methods.
  • First‑time setup (keyboard, Wi‑Fi, updates).
  • Tips to make your Pi run smoothly.

Let’s get started

What is Raspberry Pi OS?

Raspberry Pi OS (previously called Raspbian) is a free, open‑source operating system specifically designed for Raspberry Pi.

It comes in 3 versions:

  1. Raspberry Pi OS with Desktop & Recommended Software → Full version (for learning & projects).
  2. Raspberry Pi OS with Desktop (lighter, fewer apps).
  3. Raspberry Pi OS Lite (no desktop GUI) → For servers/command line users.

Beginners should start with Desktop + Recommended Software for the best out‑of‑box experience.

Step 1: Download Raspberry Pi Imager

The easiest way to install Raspberry Pi OS is using the Raspberry Pi Imager tool.

  1. Go to the official site → raspberrypi.com/software.
  2. Download Raspberry Pi Imager for Windows, macOS, or Ubuntu.
  3. Install and open the Imager.

Step 5: Updating Raspberry Pi OS

It’s a good idea to update the OS regularly. You can:

Using GUI (easy way):

  • Go to Menu → Preferences → Recommended Software/Updates.

Using Terminal:

Bash

sudo apt update

sudo apt full-upgrade -y

Step 4: Raspberry Pi Setup Wizard

On first boot, the setup wizard guides you through:

  • Language & Keyboard Layout.
  • Wi‑Fi setup (choose your network + password).
  • Update software → Pi will fetch the latest updates.
  • Set password for security.

After this, the Pi will reboot into your desktop — ready to use.

Step 6: Optional Configurations

  • Enable SSH → Remote control from your laptop.

Bash

sudo raspi-config

→ Interface Options → Enable SSH.

  • Headless Setup (no monitor needed):
    If you enabled SSH & Wi‑Fi in Imager, you can power Pi and control it entirely via terminal from your PC.
  • Install Extra Software:
    E.g., sudo apt install vlc for media player, or sudo apt install python3-pip for Python libraries.